Camera: Interpolate camera locations#
We suggest that you start with a ParaView state in which you have already set up and saved a 3D visualization but no camera movement so far.
For this example we will use the same atmospheric HD(CP)² simulation data as in the how-to on isosurfaces and isocontours in regular lat-lon data.
Time values & units in the data:
Time units: days since 2013-4-26 15:00:00
Time values: | time = 0.138194444444444, 0.138888888888889, 0.139583333333333, 0.140277777777778, 0.140972222222222, 0.141666666666667, …, 0.277083333333333 ;
Lock view size#
Prior to setting up the camera movement we suggest that you lock the view size to a fraction of your desired output resolution – e.g. 960 x 540 if you are planning to render a video in full HD (1920x1080).
Tools -> Lock View Size Custom … -> 960 x 540 -> OK
Save camera positions in advance#
As you are going to create keyframes from current camera positions, we highly recommend defining these camera positions in advance and saving them as .pvcc files; in this way you can simply load them and set the keyframes accordingly. ParaView will then interpolate between the camera positions. For each of your desired camera positions:
Set view direction by using the respective buttons and by interacting with the viewer
Click Adjust camera -> Save
Navigate to directory of your choice -> enter filename -> OK
We have picked the following two views as start view and end view of the interpolated camera path:
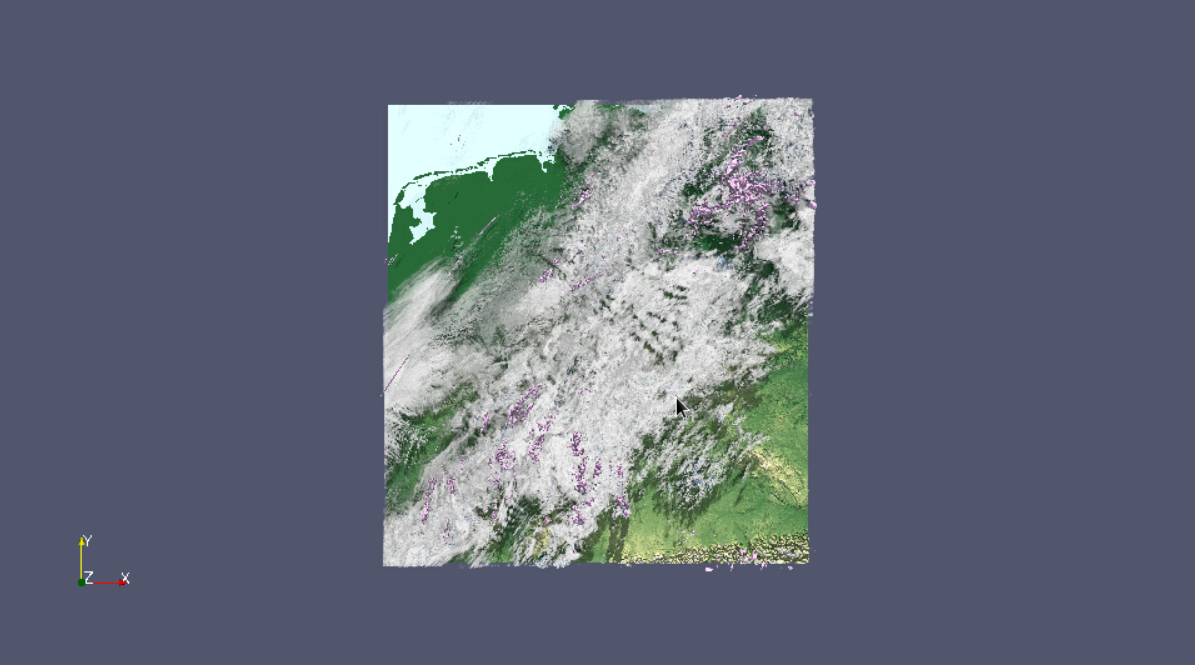
Figure 1: Start view for interpolated camera path
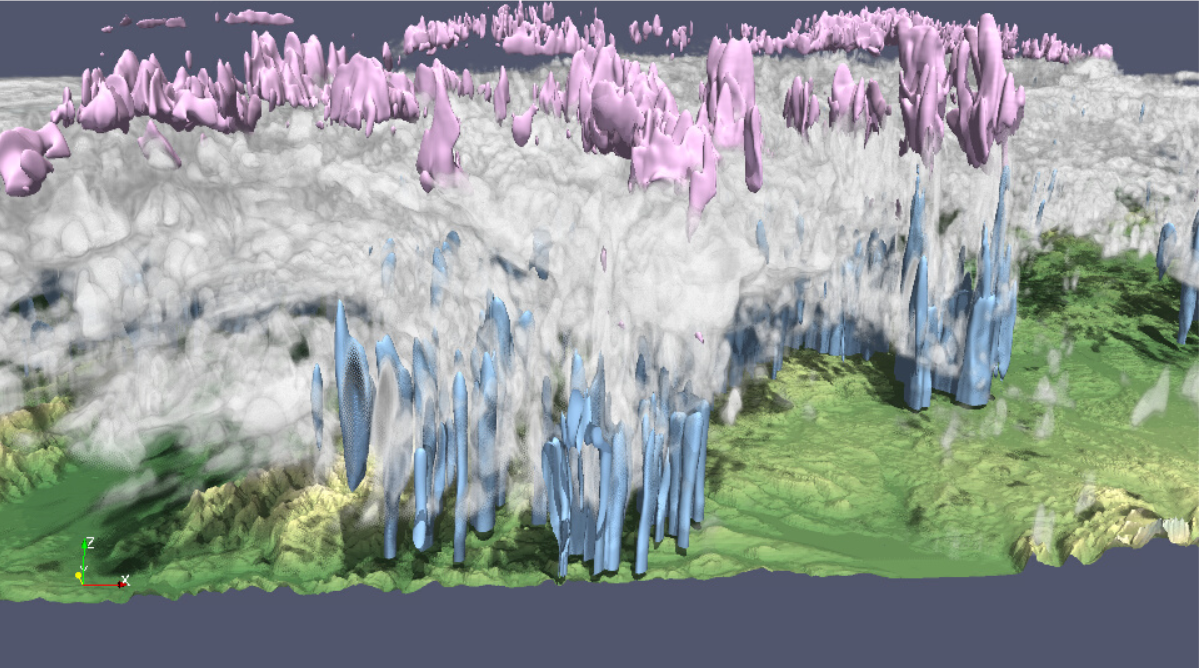
Figure 2: End view for interpolated camera path
Example 1: Camera path for one static time step
In this simple example we will define a camera movement for one single time step of the data. A more elaborate example including both camera movements and time-varying data can be found below.
For the current task, we want ParaView to display the same time step – in our case time step 1 with a time value of 0.138194444444444 – throughout the entire animation. The steps to follow are:
Double-click on the TimeKeeper1 – Time track
In the Dialogue window, check Constant Time
Click OK
In the Animation View, change the Mode to Sequence. Next you’ll need to decide on the duration of your animation. For a 10-second animation, e.g., you will need 10 s * 25 frames /s = 250 frames. Be sure to modify Start Time, End Time and No. Frames accordingly (see figure 3).

Figure 3: Animation view for constant time and 250 frames.
Setting keyframes
To set the first keyframe, make sure that the Time slider in the Animation View is at zero position. Then load the .pvcc camera settings file for the beginning of your animation:
Adjust camera button -> Load -> <camerafile>.pvcc -> OK
Then double-click in the camera track to open the Animation Keyframes dialogue shown in figure 4.
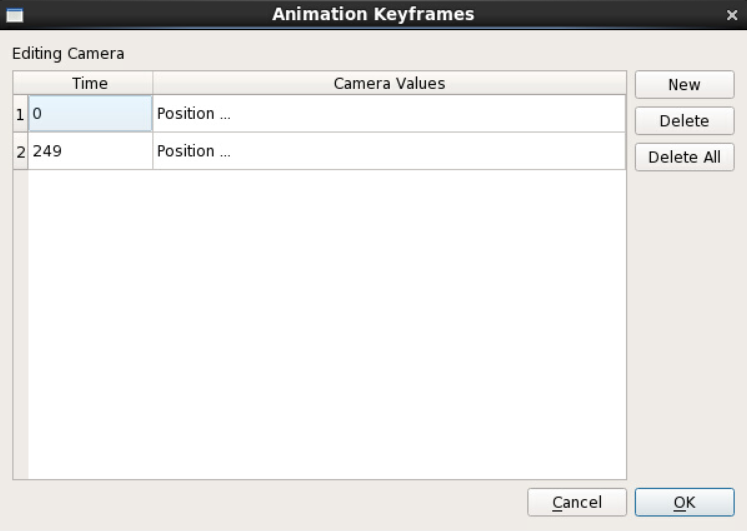
Figure 4: Animation keyframes dialogue
Every line in this dialogue window corresponds to one keyframe in your animation. The minimum number is two keyframes. To set / modify them:
Double-click on the entry
In the Key Frame Interpolation window (see figure 5), press Use Current
Click OK
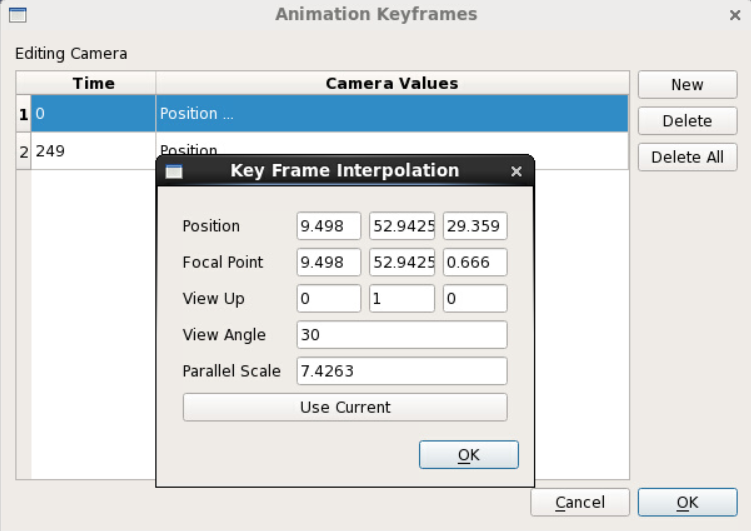
Figure 5: Key Frames Interpolation window. Press Use Current to create a keyframe for the current camera perspective
To set the second, third etc. keyframe, you can keep the Animation Keyframes window open and simply load the next camera perspective. Then double-click on the second entry in the Animation Keyframes dialogue and click on Use Current as you did before. To add a new keyframe in between, click on the New button. When you are done setting the keyframes, click OK. Then use the animation control buttons to play back the animation.
For information on saving animations we refer you to the how-to on animations and screenshots.
Tip: If you use start and end views similar to the ones displayed in figures 1 and 2 it is advisable to use more than two keyframes. ParaView will perform a spline interpolation between these two keyframes and because of the combination of zooming in and rotating the data, part of the data may disappear from the camera view as figure 6 illustrates.
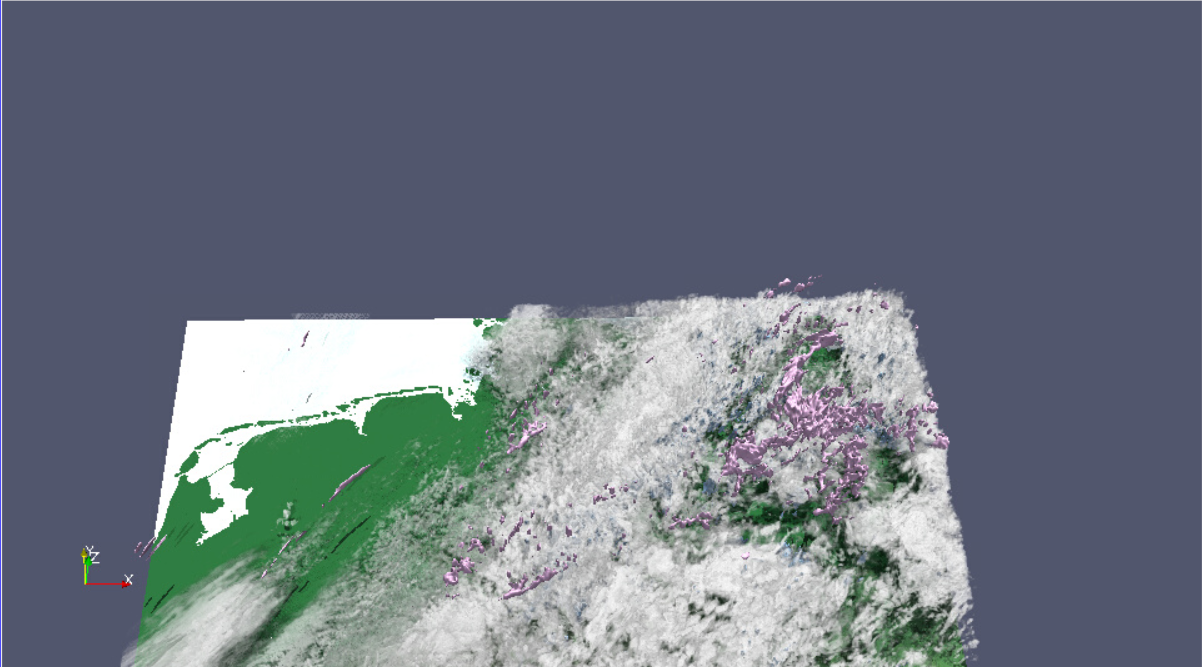
Figure 6: The camera fails to capture all of the data on the interpolated camera path
Discontinuous camera paths
Especially when creating a longer animation, it is likely that you will want to suspend the camera movement at some point or to stop it altogether.
Let us assume that, for the above example with 250 keyframes, we have created an animation consisting of 4 keyframes at time steps 0, 100, 190 and 249. The animation may look like the following video clip.
Note that ParaView has interpolated the keyframes yielding a smooth camera path. Now how do you go about inserting those pauses? The intuitive answer would be to duplicate a keyframe, e.g. to use the camera perspective of time step 100 for a new keyframe at 131. If you try this using one of the latest ParaView versions, you will notice a kind of overshoot in the camera movement. Instead of stopping, the camera will keep moving, and will move a bit further than to the position at time step 100 and then back again. This is clearly not what we had in mind. What is the solution to this problem? Duplicating the keyframes at time steps 100 and 131 once more, adding the same camera perspective at times 101 and 130 (see figures 7 & 8). That’ll do the trick.
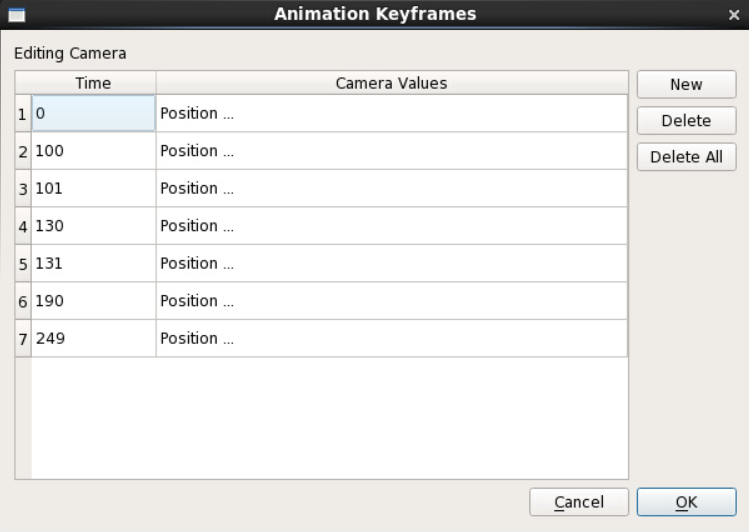
Figure 7: Animation Keyframes dialogue for discontinuous camera path

Figure 8: Animation track for discontinuous camera path. Note the duplicate keyframes in close succession to enforce a break in the camera movement.
Caveat: At least in the latest ParaView versions 5.6 and 5.5.2, a discontinuous camera path with duplicate keyframes, as described above, is not fully compatible with OSPRay rendering. While the animation may look fine when played back in the RenderView, artifacts may appear in the images written to disk (see figure 9) if your target image resolution exceeds the maximum possible resolution of the RenderView in your remote ParaView session. This maximum resolution depends on your screen size and the resolution that you specified when you started your VNC session to work remotely on the supercomputer Mistral.
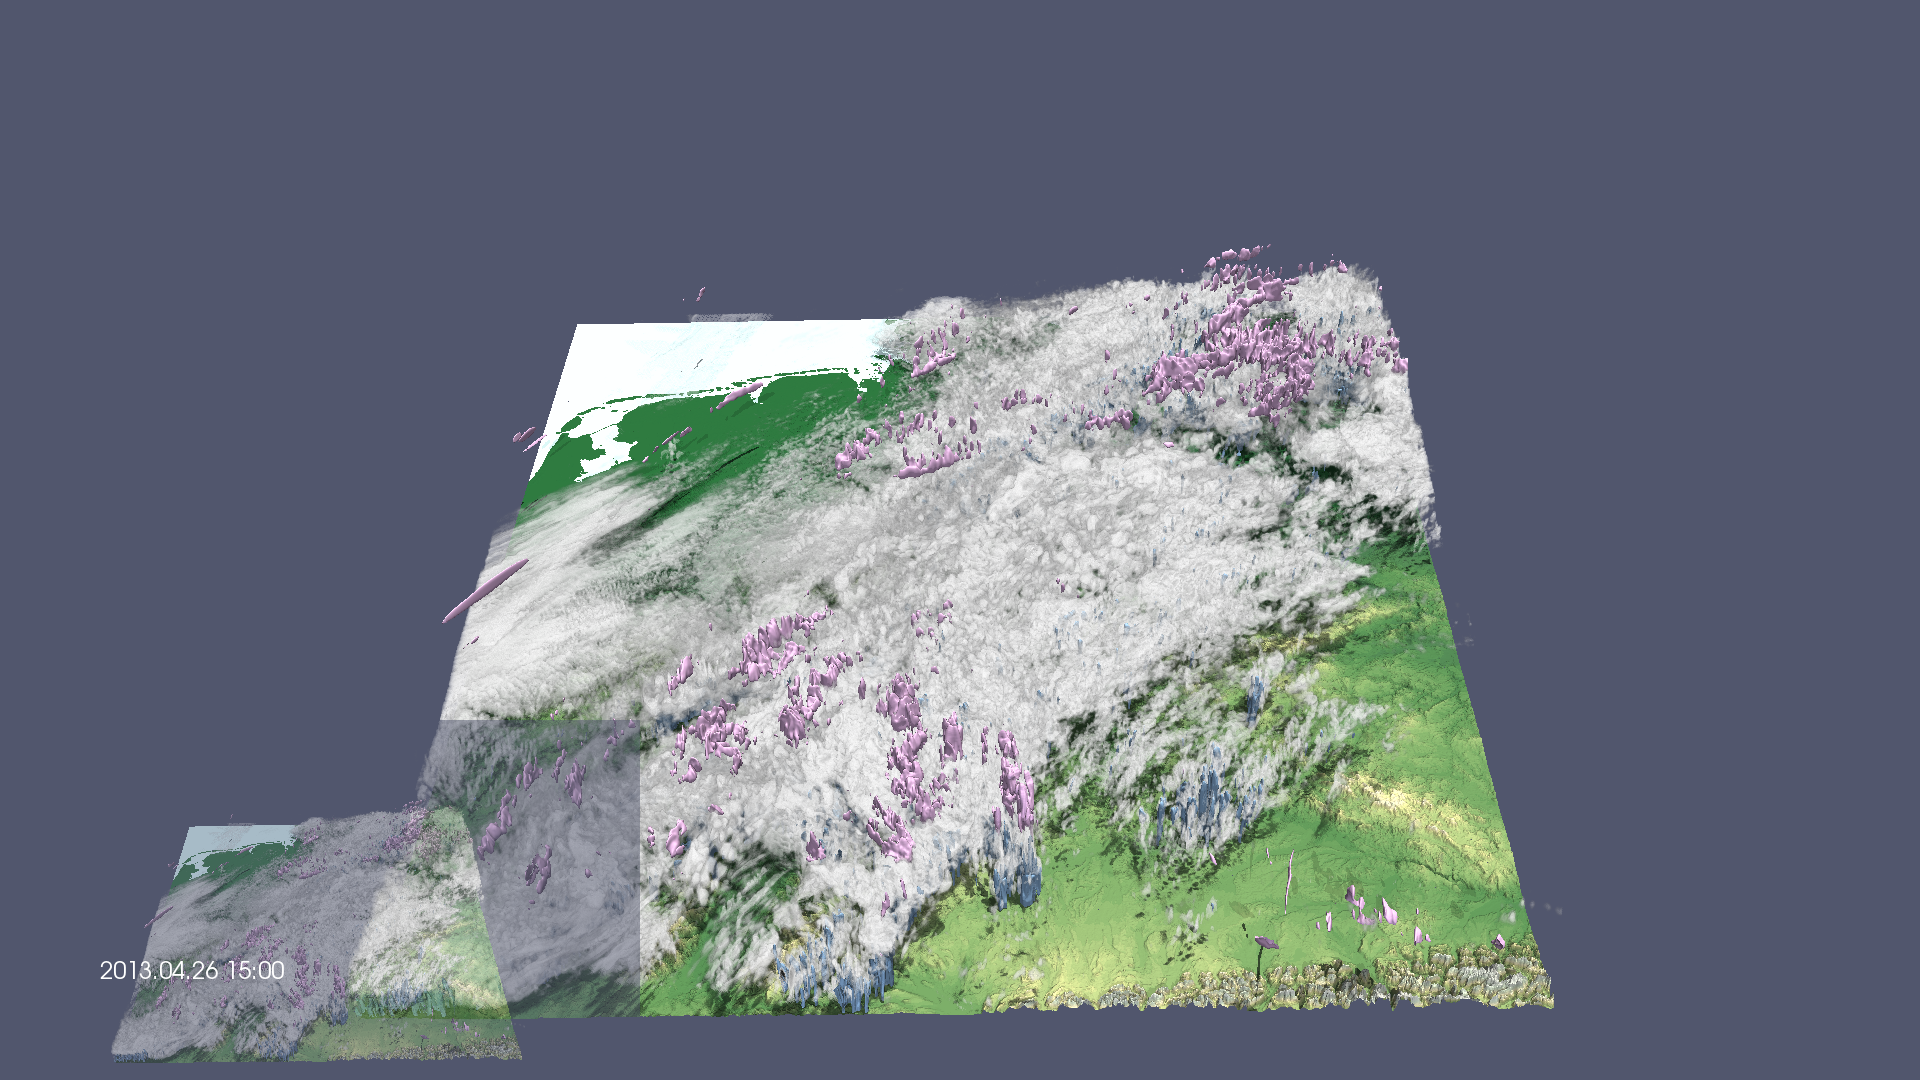
Figure 9: Rendering artifact that occurs for repeated keyframes if OSPRay is enabled
We are currently aware of 2 workarounds for this problem:
Make sure that OSPRay is switched off
If you cannot do without OSPRay:
Set up and save the “static” part of your animation as a different ParaView state file and render these frames separately. When done, assemble the different frames into one animation using video editing software.
In case your data representation doesn’t change during this pause of the camera movement, e.g. because you only want to fade in text, you could simply use a single frame that does not show any artifact, extend its duration in the video editing software and add text in there as well.
Example 2: Combining camera path and time animation
In this example we are going to extend the previous animation by adding a time animation of the data. We suggest that you continue from the previous example and save your ParaView project as a new state file.
The tutorial data sets used here comprise 201 time steps; we will thus extend the previous animation by 201 frames, i.e. one frame for each time step, resulting in a total of 451 frames.
The steps to take (see figure 10) are:
Adjust no. of frames, start time & end time accordingly (0-451 )
Double-click on TimeKeeper 1 – Time, change to Variable Time
Make sure that times 0 & 249 have value 0.138194 (time step 1)
Click New -> Change Time to 450 and value to 0.277083 (last time step)
Keep the default interpolation method Ramp
Click OK
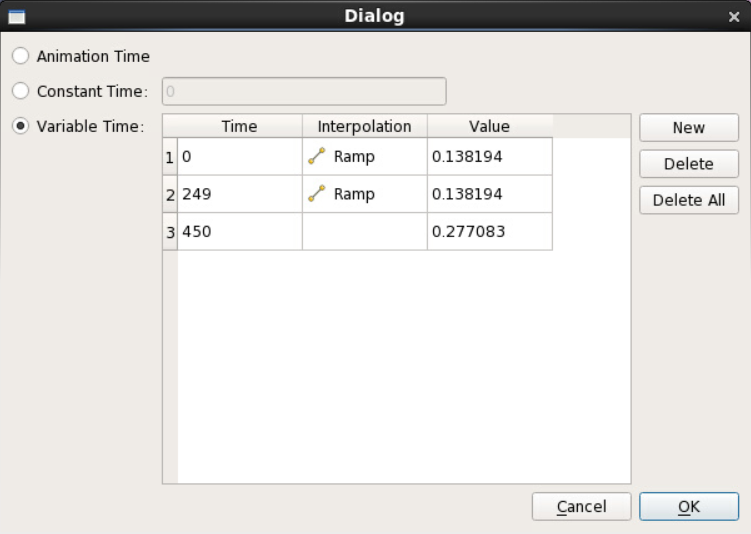
Figure 10: Setting up a time animation of the data starting at frame 250 of 451
Upon double-clicking on the camera track you may notice that the time values of the keyframes have shifted. Please overwrite the time values and add a keyframe at the very last time step as per figure 11. Compare your Animation View to figure 12.
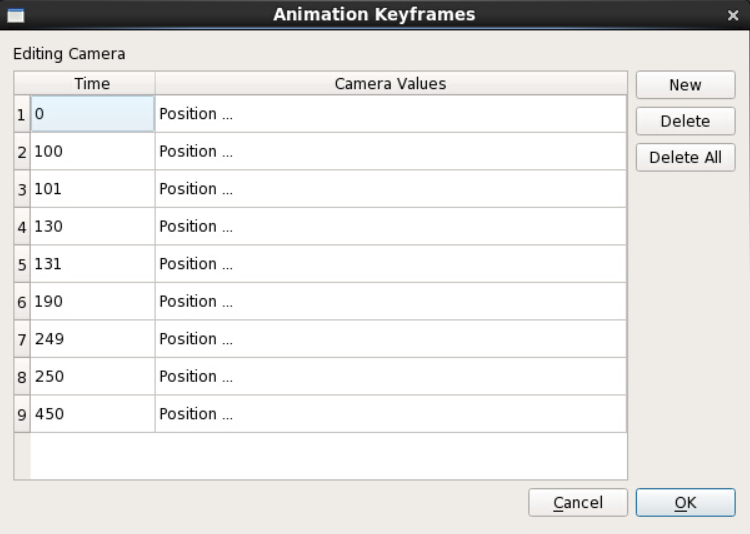
Figure 11: Adjusting the animation keyframes

Figure 12: Animation track for discontinuous camera path extended by time animation
Last but not least we would like to annotate the animation with the respective time and date stamp of the data displayed. This can easily be done using the NetCDF Time Annotation filter described here. When you have added this filter, make sure that the TimeKeeper 1 – Time track is active in the Animation View. Compare your animation to the following video clip:
Done? Be sure to save your project as a ParaView state file in case you have not yet done so.