Automating visualizations in ParaView with PvBatch#
This manual is new and might need improvements. If you encounter any problems with this manual, please feel free to contact Flo. Special thanks to our intern Florian B for creating the basic text.
As an example, we are interested in the longitude from 20° 0’ 0’’ S to 14° 0’ 0’’ S and the latitude from 26° 0’ 0’’ E to 30° 0’ 0’’ E. In the following, we will create a set of python scripts that will do the dirty work of running paraview.
Data selection#
To select a subset of your data you can use the sellonlatbox operator from the climate data operators module (CDO):
#!/usr/bin/env python

from cdo import Cdo

lonlatbox = [-20, -14, 26, 30]
cdo = Cdo()
cdo.sellonlatbox(','.join(map(str, lonlatbox)), input='path/to/inputfile.nc', output='path/to/outputfile.nc')
Set the path for the output file to a large enough directory such as scratch.
If you are also interested in selecting certain time steps, use the seltimestep operator and chaining:
timestep=1
cdo.sellonlatbox(','.join(map(str, lonlatbox)), input='-seltimestep,'+timestep+' ' + 'path/to/inputfile.nc', output='path/to/outputfile.nc')
Creating a template#
Next, we are going to create a template for the loading and the visualization of the data. Open the ParaView GUI, read the data into ParaView and apply your visualization options. Notice that you can use a smaller dataset in this step as long as the variable names and units are the same. In our example, we use the CDIReader to load the data and calculate the magnitude of the wind using Filters -> Alphabetical -> Calculator. In the properties tab of Calculator1 we change Result to mag and apply the following formula:
mag(U_M10*iHat+V_M10*jHat)
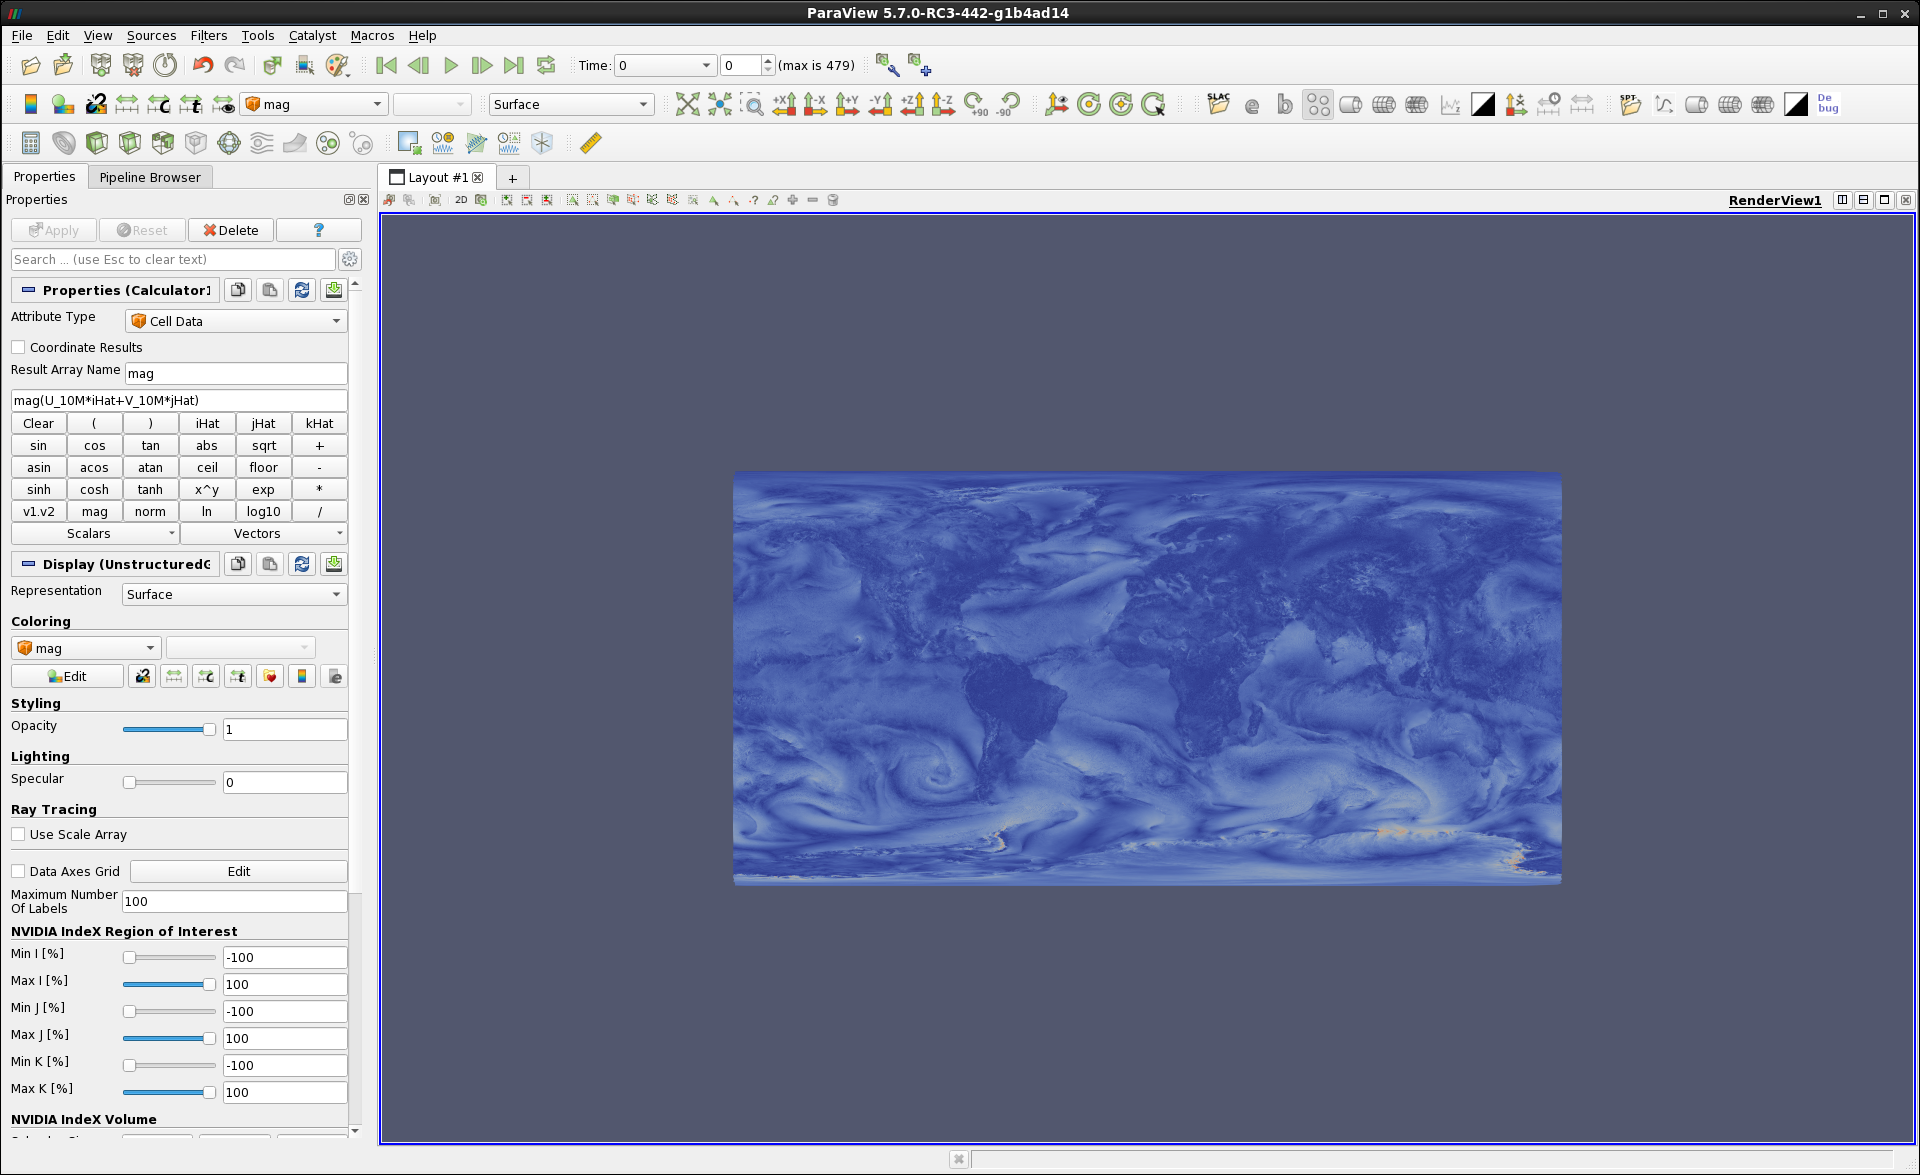
Figure 2: Calculating the magnitude of the wind
For more information on filters see ParaView Tutorial.
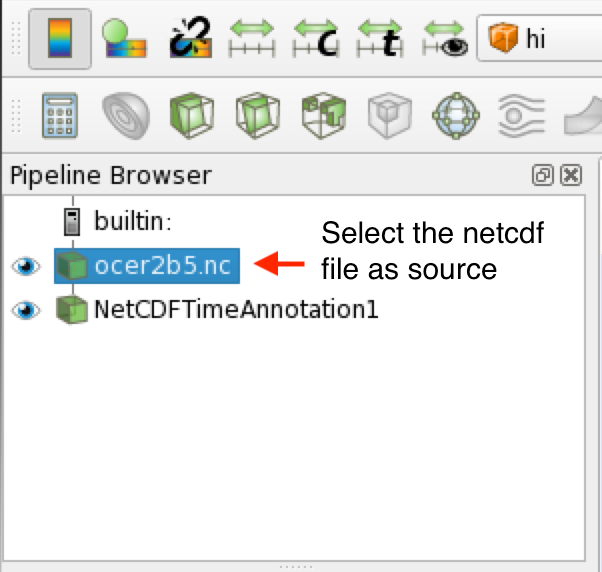
When you are done, select your netcdf file in the pipeline view, then save your current state as python state file ( File->Save State…; switch to “Python state file (*.py)” in the dialog). The default options of the following dialogue are good.


The state file contains the Python code that we use as a template. Notice that the template works independently of the longitude latitude box. Thus, we can use the same template to record animations of different locations. Next, you can combine this Python script with the script containing the CDO code and change the FileName in the reader to the outputfile of the first part.
To make the script work in interactive mode add
#import sys
and change your reader to load the command line arguments instead of the default file, look for the first real action in the script / search for “FileNames” or “.nc”, and change the file names to sys.argv[1:].
# ----------------------------------------------------------------
# setup the data processing pipelines
# ----------------------------------------------------------------

# create a new 'CDIReader'
pathtoinputnc = CDIReader(FileNames=sys.argv[1:])
Changing the camera and perspective#
If you are happy with the camera and perspective from your interactive paraview session, you can skip this part. If you want an automatic zoom on the data you selected above with cdo, please follow these instructions.
Setting up the camera is somewhat difficult because the camera uses ParaView’s world coordinates (“cartesian coordinates”) and we only have the longitude and latitude of the data we are interested in. However, for 2D projections we can calculate the camera position as follows, with “pathtoinput.nc” being the name of the input data file:
bounds = pathtoinputnc.GetDataInformation().GetBounds()
x_center, y_center, z_center = [(x+y)/2 for x,y in zip(bounds[0:6:2], bounds[1:6:2])]
width, height, depth = [abs(x-y) for x,y in zip(bounds[0:6:2], bounds[1:6:2])]
height_picture = 855 #height of the picture in pixels
ratio = height / width
width_picture = int(height_picture / ratio)
If you want to lower the resolution of the images change height_picture to a lower integer. Next, we have to set the Camera to the above coordinates and update the render view.
renderView1.ViewSize = [width_picture , height_picture]
renderView1.InteractionMode = '2D'
renderView1.CameraPosition = [x_center, y_center, 10000.0 + z_center]
renderView1.CameraFocalPoint = [x_center, y_center, z_center]
renderView1.CameraParallelScale = (height / 2.0)
renderView1.Update()
The above approach does not work well for 3D projections. For 3D projections you should set the camera position in the GUI while you are tracing the template or load camera positions from previous projects.
Creating an image or an animation#
reader=GetActiveSource()
# Here it is important that the correct source (netcdf file) is activated with SetActiveSource.
# This can be controlled by activating it in the pipeline view before saving the state file.
# Can also be changed manually in an editor, search for SetActiveSource in the source code (usually at the bottom).
tsteps=reader.TimestepValues
view = GetActiveView()
for n,t in enumerate (tsteps):
 print ("rendering for time %f"%t)
 view.ViewTime = t
 SaveScreenshot('image-%04d.png'%n, ImageResolution=renderView1.ViewSize) # or set your own resolution like (3840,2160)

# can also work, but can also produce garbage timesteps
# SaveAnimation('path/to/image.png', renderView1, ImageResolution=renderView1.ViewSize)
to the end of your script or to save the view as an image add:
WriteImage('path/to/image.png', renderView1, ImageResolution=[width_picture , height_picture])
Running the script:#
# on a graphics node:
module load paraview
vglrun pvbatch MY_SCRIPT_FILE.py
or submitting it to a compute node:
#!/bin/bash
#SBATCH --job-name=paraview-job  # Specify job name
#SBATCH --partition=compute2 # Specify partition name
#SBATCH --nodes=1 # one node usually is way more than enough. Feel free to reduce to a fraction on shared
#SBATCH --time=00:15:00 # Set a limit on the total run time
#SBATCH --mail-type=FAIL # Notify user by email in case of job failure
#SBATCH --account=ACCOUNT  # Charge resources on this project account
#SBATCH --output=paraview-job.eo%j # File name for standard output
#SBATCH --error=paraview-job.eo%j # File name for standard error output
set -evx # we want to know what happens why
module load paraview/5.7-insitu
which pvbatch # just being curious
pvbatch MY_SCRIPT_FILE.py
Turning images into videos#
Notice that ParaView does not produce animations but rather returns all the necessary images to create an animation. Use
ffmpeg -i path/to/image-%4d.png -r 1 output.avi
in the terminal to create an animation from the images or add openCV to your Python script.
Troubletshooting#
Depending on the installation, ParaView does not automatically load the plugins. If you are using the CDIReader, you might have to add
LoadPlugin("/sw/rhel6-x64/paraview/paraview-5.7.0-gcc71/lib64/paraview-5.7/plugins/CDIReader/CDIReader.so", True, globals())
(or something similar matching your paraview installation) to the beginning of your script.
AttributeError: Attribute <name of the attribute> does not exist.
To resolve this issue either load the missing plugin at the start of your script (after loading the paraview.simple module. A bit of guessing and the list of plugin files in the paraview directory will help you find the correct plugin), or search for the line containing <name of the attribute> and delete that line and all after that one belonging to that instance. This should not alter your visualization. If it does, only delete the lines that cause the AttributeError.
If you forgot to use vglrun on a gpu node with the normal paraview, you get a screen full of errors with this basic look:
[...]
Xlib: extension "GLX" missing on display ":1.0".
[...]
3 0x2b57d7a568b7 vtkXOpenGLRenderWindow::CreateAWindow() + 1831
2 0x33b4633cd5 abort + 373
1 0x33b46324f5 gsignal + 53
0 0x33b4632570 /lib64/libc.so.6() [0x33b4632570]
( 2.373s) [main thread ] :0 FATL| Signal: SIGABRT
make sure to use vglrun pvbatch for running your script.