Saving animations and screenshots#
Creating images and screenshots#
There are two ways of saving the RenderView’s contents as an image. Both can be found under File in the main menu:
Save Screenshot…
Export Scene…
So what is the difference? Save Screenshot… will open a dialogue window for saving either a Bitmap, JPEG, PNG or TIFF image. Export Scene… allows for saving vector graphics files (PS, EPS, PDF, SVG, among others) but we do not recommend this option for detailed climate data visualizations. Complex visualizations cannot be appropriately represented by scalable vector graphics.
Once you have selected a file name and location for saving, click OK - the window Save Screenshot Options (see figure 1) will pop up. Here you can set the desired Image Resolution, the Compression Level, and a Transparent Background, if needed. To save the image, click OK.

Figure 1: Save Screenshot Options
If your selected Image Resolution differs from the Preview in the RenderView, especially if it is smaller, part of your visualized data may be cut off and size, position and proportions of the colorbar may not be right. Therefore it is advisable to adjust the preview size prior to saving a screenshot. To do this, select
Tools -> Lock View Size Custom …
This opens a dialogue window, in which you can enter the maximum resolution of the view (see figure 2). Depending on your screen size and your desired screenshot resolution, you may want to use a lower resolution with the same aspect ratio as your desired screenshot output resolution in order to see the entire render view with colorbars and annotations at their actual position. You may want to use, e.g.:
612 x 384 instead of 1024x 786
960 x 540 instead of 1920 x 1080
Once you have clicked either Apply or OK, the image in the RenderView will be resized accordingly, and you will notice that the option Tools -> Lock View Size is now checked.
With the view locked, you can then save the view as a screenshot via File -> Save Screenshot… in the proper image resolution. Caveat: If you’ve locked your view to a size that is larger than your screen resolution allows, the “Save Screenshots Options” dialogue window will automatically show the highest possible resolution for your screen in this VNC session. By overwriting these values with an even higher resolution and saving the respective screenshot, artifacts may appear in the final image.
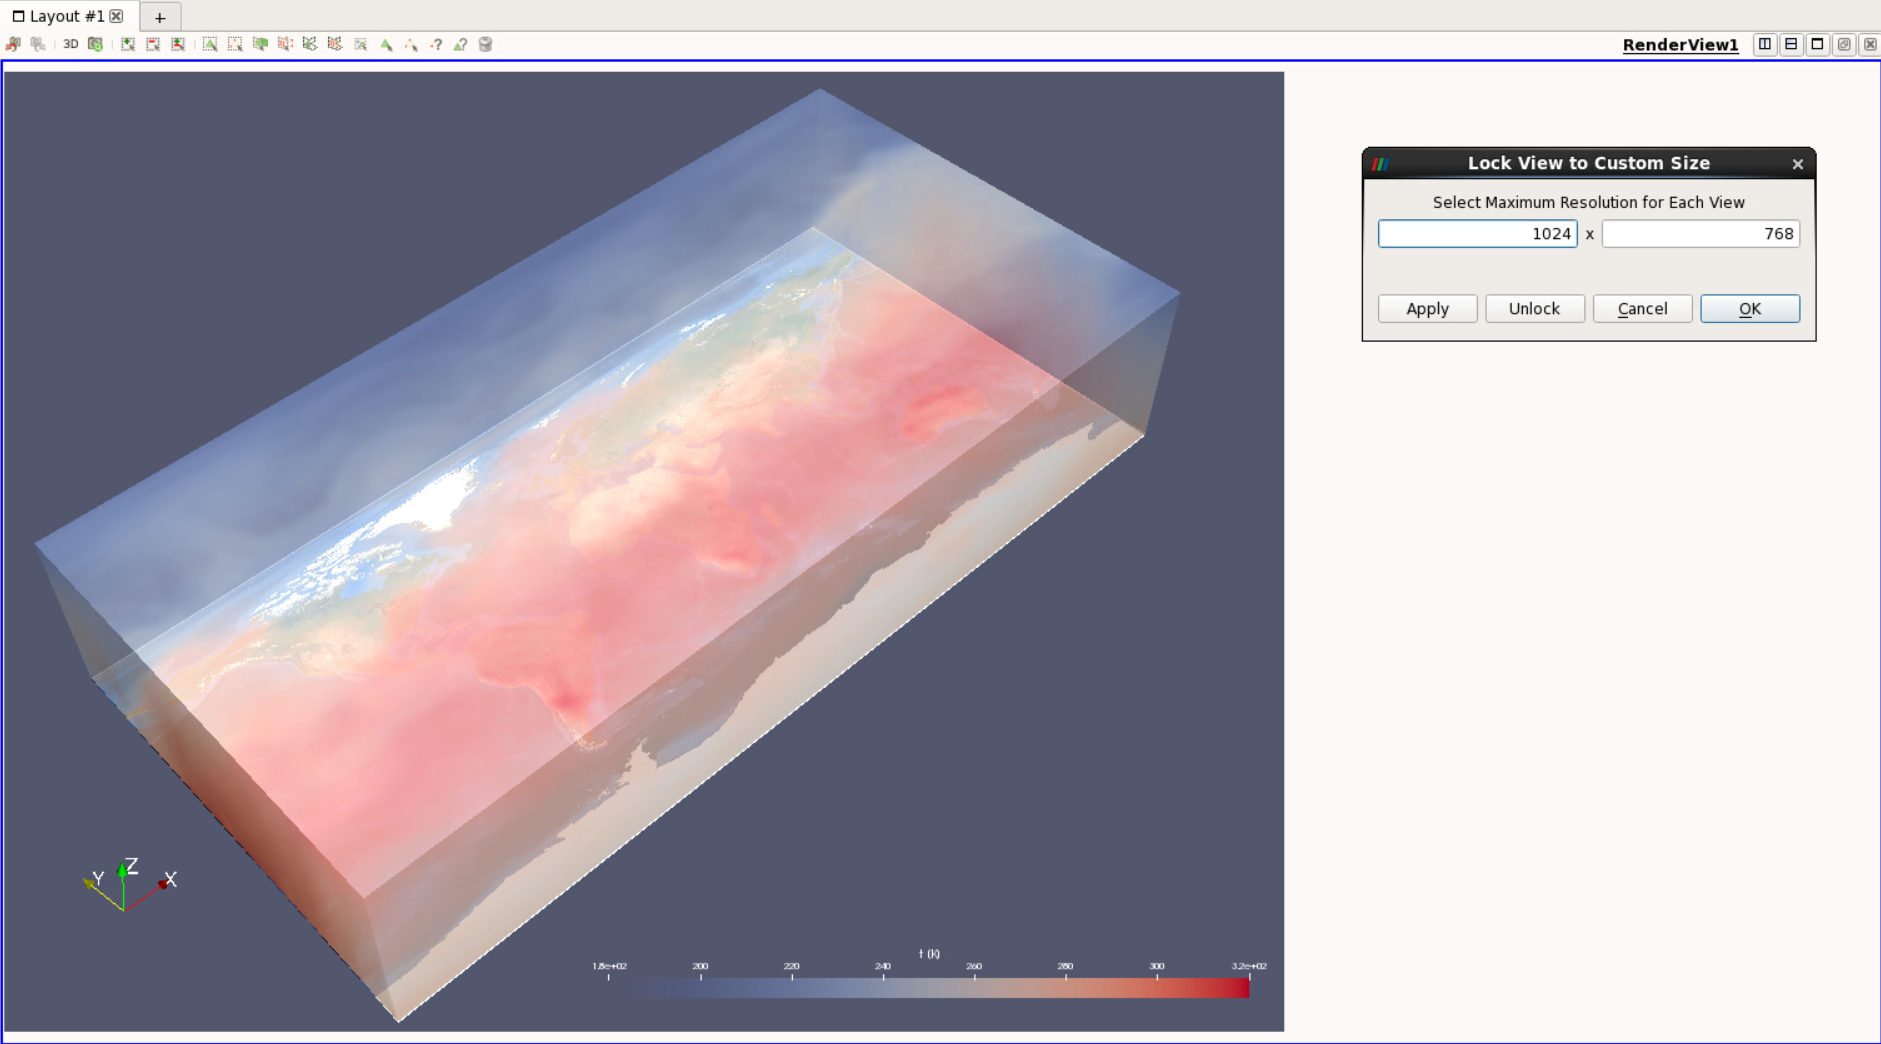
Figure 2: Locking the view to custom size
To unlock the view again, you can either uncheck the option or return to Tools -> Lock View Size Custom … to click on the Unlock button.
Creating animations#
In this section you will learn how to create simple animations of time series data with a static camera view. For more advanced animations that include setting animation keyframes, we refer you to the more advanced how-tos on Camera Paths, Camera Orbit, and on interpolated camera locations. The detailed and comprehensible chapter on animations in the official ParaView Guide is also a valuable resource and has contributed significantly to our understanding of animations in ParaView.
Animating the data
The tool and user interface for creating any of the aforementioned animations is the Animation View (see fig. 3), which can be activated via the View menu. By default, the Animation View has only one active track or row, which is TimeKeeper1 – Time. That is all we need for this example, in which we only want time to progress.

Figure 3: Animation View with default settings for a dataset comprising 100 time steps.
The default Mode is Snap to TimeSteps, yielding a timeline from 0 to 100 and no further time control options. To animate the data displayed in the Render View, you can either press the green VCR animation control buttons in the main toolbar or click and drag the vertical black slider in the timeline. If you click the Play button, one time step after another will be played.

Figure 4: VCR animation control buttons in the main toolbar
Number of frames and duration
Let us suppose that you exported an animation with the above settings, either as a series of image files or directly as a video file. What would be the duration of your video? The typical video frame rate for PAL is 25 frames (i.e. single images) per second or fps, yielding a smooth playback result. An animation consisting of 100 time steps – and thus 100 frames – would result in a playback time of only 4 seconds. To create a longer animation we suggest changing the Mode to Sequence and setting the number of frames explicitly. The ratios to consider are:
Total no. of frames / 25 frames per sec. = Total no. of time steps / x time steps per sec. = duration (s)
25 frames per second and the total number of time steps are fixed; you can now either decide directly on the total duration of your animation or on the number of time steps per second and calculate the total number of frames and duration accordingly.
In Sequence Mode, the total number of frames needs to be set explicitly in the field No. Frames. Note how the tick marks on the timeline change accordingly.

Figure 5: Animation View withSequence Mode
Saving the animation Save your animation by clicking on File -> Save Animation…
This opens a dialogue window, in which you select either an image file (format Bitmap, JPEG, PNG or TIFF) to produce single frames or the Ogg-Theora video file format (.ogv). This container data format is not very widespread, but can be played back using the VLC media player on Linux or Windows machines. Please note that Ogg-Theora video files can only be edited by specific video editing tools for Linux. Exporting a series of images, e.g. PNG files, and merging them into an animation using video editing software or the **ffmpeg*, is the more flexible option that we recommend. If you do decide on the Ogg-Theora output, make sure that you use the proper frame rate as described below.
Navigate to a folder where you have write access to save the image files. You may want to create a new folder for the animation via the Create New Folder button. Press Ok to get to the Save Animation Options displayed in Figure 6.
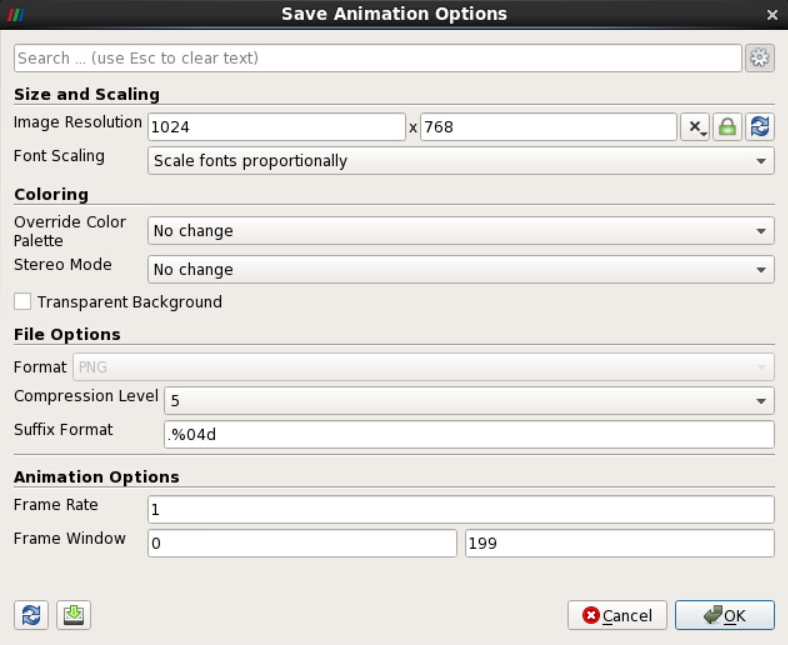
Figure 6: Save Animation Options with Advanced Settings enabled.
Having enabled the advanced properties via the gear wheel symbol on the top right you can set:
Image resolution (1024 x 768, 1920 x 1080, etc.)
Font scaling (for colorbars etc.)
Change background color or make background transparent
Set image compression level
Frame rate – important for *.ogv output only (value should be 25 then)
Frame window, i.e. first and last frame to save
The Frame window is useful if you would like to split your animation rendering job or if you need to render only a part of the animation, e.g., in case your session was terminated or after a program crash. Before you start rendering from any other frame than the first one (i.e. frame 0), make sure that the time slider in the Animation View is positioned accordingly.
To start the rendering process, click OK. The individual images will be saved with a consecutive 4-digit numbering, starting with ‘0000’ in the file name. What if you need to interrupt the process of rendering and saving the images to disk? As the abort button (x) below the Animation View will not terminate the rendering process as a whole, renaming the image output directory will.
Remember to save your ParaView project as a state file.